Setting up iTerm2, zsh, and Oh My Zsh
I recently joined the cool kids club by purchasing a Macbook Pro. I have primarly used Windows but was exposed to the Apple ecosystem for the better part of a year in my professional careers.
While I still appreciate the Windows operating system, at the moment, I find that developing software is less of a hassle with macOS. Hearing MinGW and Cygwin may or may not make me cringe.
Also, while Windows Subsystem for Linux (WSL) is greatly improving the development workflow on Windows, macOS is based on Unix so many things come straight out of the box.
Since I wrote a bit about my windows terminal workflow, I thought I could document something similar as I transition to macOS.
Homebrew
First, we are going to install Homebrew. This is a package manager for macOS that will make installing future software more simple.
To install, just issue the following command in your terminal:
/usr/bin/ruby -e "$(curl -fsSL https://raw.githubusercontent.com/Homebrew/install/master/install)"iTerm2
We will be using iTerm2 as our terminal emulator. I like it because it is pretty performant and customizable! Go ahead and download the application straight from their site.
You will probably want to tweak the settings a bit to make it look the way you want. We will add themes and plugins after we install zsh but you can change the colors, fonts, etc. at this point.
I am currently using the Fira Code font with ligatures. Also, as a personal preference, I changed the working directory of iTerm2 (the location where it starts up) to /Users/davidtran/code.
Here is my current iTerm2 profile, if you are interested.
zsh
zsh is just a Unix shell with additional features. It is just one of the many shells you can use; I use this one simply because it was the first one I picked up.
Let's install it!
brew install zshEasy, right? Praise the great Homebrew!
Oh My Zsh
Oh My Zsh is a framework for managing zsh configurations.
Install it with:
sh -c "$(curl -fsSL https://raw.githubusercontent.com/robbyrussell/oh-my-zsh/master/tools/install.sh)"Theme
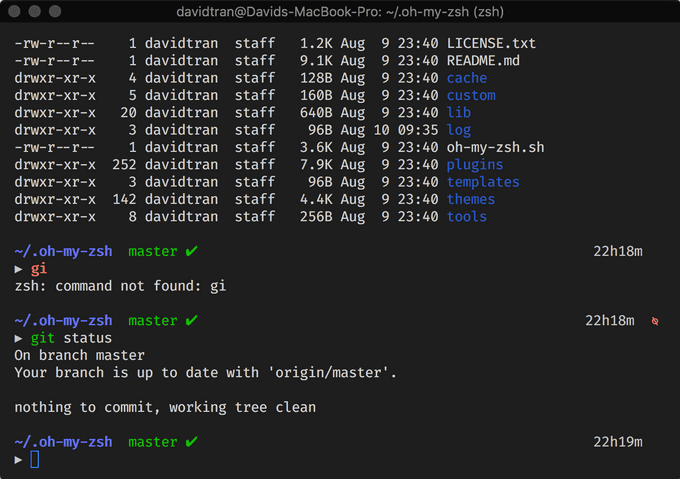
The theme I am using is Avit. It displays the current path (up to 3 previous directories). The current branch, its state (clean / dirty), and time since last commit is shown if the current directory is initialized with Git.
Also, I especially appreciate how it provides a new line for every new command. I do not need to navigate the current line to see what I typed, which might consume a non-zero amount of energy. #smallwins
This theme, along with many others, are installed along with Oh My Zsh. You can also install custom themes.
To use a theme, set ZSH_THEME to your theme of choice in ~/.zshrc.
ZSH_THEME="avit"Plugins
Similar to themes, there are numerous bundled plugins. I am still in the process of finding ones that improve my workflow but one I enjoy using is zsh-syntax-highlighting.
This plugin was actually a custom plugin so I had to install it manually.
git clone https://github.com/zsh-users/zsh-syntax-highlighting.git ${ZSH_CUSTOM:-~/.oh-my-zsh/custom}/plugins/zsh-syntax-highlightingAfterwards, we need to add it to plugins in ~/.zshrc.
plugins=(
  git
  zsh-syntax-highlighting
)
Final Thoughts
So far, I am enjoying using iTerm2. I was already familiar with zsh and Oh My Zsh from when I set it up on Windows but the installation and maintenance seems easier with a true Unix shell.
I am also trying to utilize Vim (with iTerm2) full-time on personal projects, again. Look out for a post on setting up vim and tmux!
